Horticulturist Hillary Thompson jokes that she can’t even get the notoriously easy-to-grow Bermuda grass to live in her backyard. “Our ground can be water-logged, and the clay is dense. It’s hard to get anything to grow, much less vegetables,” she says.
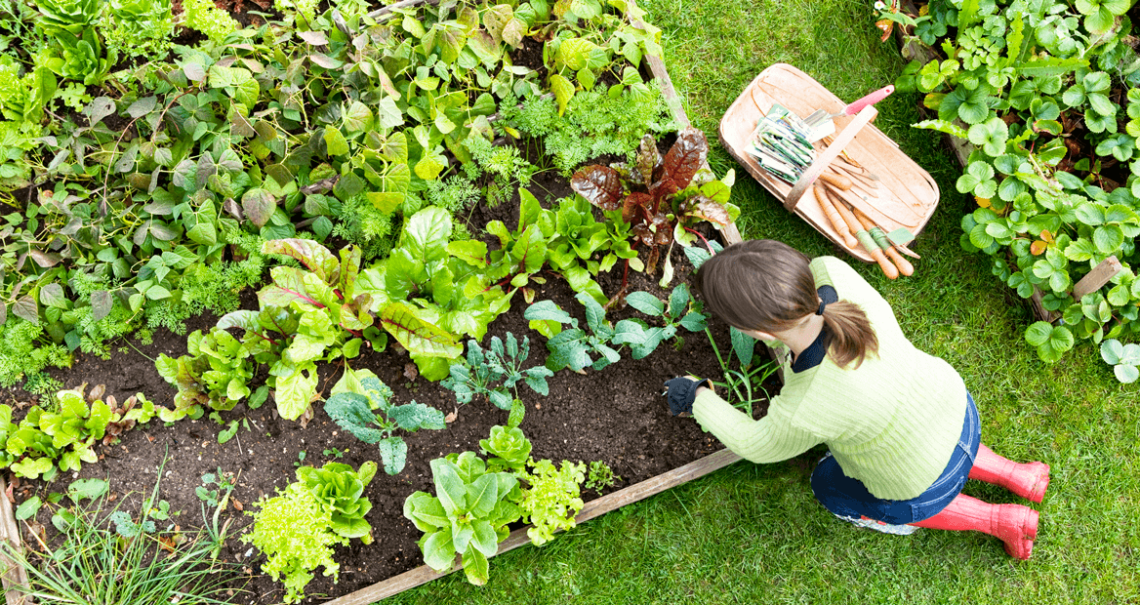
Thompson’s solution: raised beds. “At first I started using them because they elevated those low, wet areas,” she says. But then, Thompson realized an unexpected benefit: “They’re easier on the body, too. I’m 48 years old; bending all the way over to the ground is starting to be hard on my back and legs,” she says. “Raised beds are higher, so you bend over less.”
Add reduced soil compaction, easier cultivation, efficient watering and fertilizing, increased yield, and adaptability to small areas — and it’s hard to imagine growing vegetables any other way, says Thompson. As she gears up for warmer weather, Thompson shares her tips and tricks for raised-bed vegetable gardening.
Step 1: Gather your materials.
A raised bed is any garden bed that is raised up off the ground. And think outside the typical rectangular set-up: The sky is the limit when it comes to size and shape — it just needs to be 8 inches deep. “You don’t even need a yard to have a full-fledged vegetable garden,” Thompson says. “Consider corrugated metal feed troughs, pots, or even fabric planters.”
Thompson has seen fruitful container gardens made out of found materials like stone, reclaimed wood, and logs. The only material she cautions against are railroad ties. “They’re treated with arsenic to make them last — so are best kept on railroads,” she says.
Even the container itself is optional. “While raised beds generally have a defined border of rigid material, if you have a lot of land, you may not even want siding,” she says. “You can just mound up 8 inches of compost. It’s still raised!”
Step 2: Maximize soil health.
Once you’ve chosen a container and placed it on level ground, fill it with dirt. “I recommend pure compost heated to 160 degrees, which kills off weed seeds and pathogens,” Thompson says. “You don’t have to use native soil. Aged compost is properly broken down and will feed the plants readily.”
When you pick it up, the dirt particles should feel crumbly and light in your hands. “That’s perfect and means it’s nice and broken down,” Thompson says. “Just be sure to steer clear of biosolids; horse manure, which could contain persistent herbicides; and peat, a filler with no nutritional value for your plants.
Because compost breaks down over time, every time you plant new vegetables, you’ll need to “top dress” your soil. In other words, top it off with a couple of inches of compost. You can also treat your soil with a light organic fertilizer. Thompson recommends Plant-tone Organic Fertilizer, “a super organic fertilizer for vegetable gardens.”
Step 3: Plant seeds or transplants.
According to Thompson, one advantage to raised-bed gardening is you get a jump start on all your favorite vegetables. “The earth usually holds in the heat or the cold, but since your beds are raised, they warm up or cool off a little earlier,” she says.
North Carolina vegetable gardens usually fall into one of two categories: cool-season crops (August through March), and warm-weather crops (April through July).
Cool-season crops include leafy crops and brassicas. “Think spinach, lettuce, broccoli, collards, Swiss chard, mustard, arugula, kale, and cabbage,” Thompson explains. “You can also plant carrots, cilantro, peas, and radishes.”
In the warm-weather crop category, Thompson adds beans, sweet potatoes, squash and pumpkins, cucumbers and melons, and night shades like peppers, eggplants, and tomatoes. Not to mention corn and okra, two of her favorites.
With the exception of night shades, which thrive when started as transplants, sow seeds directly in the ground. Curious about how far apart to space your plants? Follow the directions on your seed packets — but use the lower end of the range. “Consider the ultimate size of the plant, but I like to plant dense to keep down on weeds,” Thompson says.
If deer are a problem in your area, create a natural barricade of plants that deer find offensive, like rosemary, arugula, oregano, basil, or even peanuts and potatoes.

When planting your seeds, consider how large the plant will become. You can also consult your seed packets for specific spacing information.
Step 4: Establish a system for watering.
Because raised beds are compact, watering is efficient and easy. “You’re watering a compact rectangle, not spread-out rows,” says Thompson, who relies on drip irrigation to water her backyard beds.
“If you have multiple raised beds, my advice is to position them with a two- to three-foot-wide path between them, which makes it easy to maneuver your wheelbarrow and wander around in there easily.”
Since the beds are in close proximity, it’s easy to install an interconnected drip irrigation system. Run a standard garden hose from the faucet, and at the edge of the raised bed, use a coupler to attach a soaker hose that runs through the raised bed. At the far end of the raised bed, use a second coupler to attach another standard hose that will run to your second raised bed.
Continue this process until you’ve established a set-up with soaker hoses running through all your raised beds. “When you rely on drip irrigation, you aren’t watering the pathways or the surrounding area,” says Thompson. “Especially in cities where water is expensive or scarce, this is a big benefit.”

If you have multiple beds in close proximity, create an interconnected drip irrigation system.
Step 5: Share your bounty — and success stories.
“I love the idea of being a part of a gardening community where you and your fellow gardeners pass along ideas and learn from each other, not to mention sharing your vegetables!” Thompson says. “I often start with too many tomatoes and give them to friends, who share their eggplant or kale.”
Plus, it’s fun to have a buddy who’s up for planning dinners out of the garden or swapping gardening books, she adds. “It’s also helpful to attend garden shows, where you can hear speakers with inspiring new ideas, see new products, and buy plants.”