Of all the things my mother cooked when I was growing up, her fried chicken was right at the top among my favorites. The only thing I probably loved more was her buttermilk biscuit recipe and maybe her chocolate layer cake. Wait… there’s the spaghetti, the potato salad, the… oh well, you probably get the picture. It was Mama, and it was ALL good.
Mama cooked her chicken in the very cast iron skillet that is pictured below. I wish I didn’t have it. If I didn’t have it, that would probably mean she was still with us and still cooking her delicious fried chicken. Today, I’m deeply honored to have this skillet in my kitchen. It stays out on my stove top and I use it almost daily.
Frying chicken may be another one of those dishes you just haven’t conquered. Either you’ve tried it and the chicken ends up being raw on the inside or it turns out overcooked and dry – it happens to all of us. I suspect even Mama failed a time or two while she was learning.
I use a little system I call 8-8-8-8. It’s pretty simple really. You prepare the chicken and place it in the skillet, cover it and let it cook 8 minutes. Next, you uncover it and cook it 8 more minutes. Then, you flip the chicken over, cover it and let it cook 8 more minutes. Uncover it and let it cook until it’s done. After the final 8 minutes, you’ll have chicken that’s typically done and not pink inside.
I’ll show you the steps in the photos below. It’s an easy way to learn to fry chicken in a pan, but it’s not a steadfast rule. You may find that 6 minutes, 7 minutes, or maybe 9 minutes work best for you. That’s the fun and joy of cooking – it varies from house to house, stove to stove, person to person. You just need to get started and learn what works for you.
The recipe is very basic. You will not find any secret recipe of multiple herbs and spices here. We only use salt and pepper like Mama did. Learn the basics first, then spice it up the way you like it.
We’ll use the pan drippings and browned bits from frying the chicken to make some gravy to go on top. My brother often tells me how much he loved Mama’s fried chicken with gravy. I don’t remember it as well as he seems to, but when I placed some gravy on this chicken and took a bite I was transported right back to Mama’s table for Sunday dinner. It’s amazing the memories that a simple recipe can recall for you.
So, if you’re ready to get in the kitchen, let’s fry up a batch of chicken and make a little gravy to go along with it. I’ve got the chicken and gravy covered, you just bring the mashed potatoes. Ready to get started? Alright then, let’s get cooking!
What you’ll need to make the chicken
- 1 whole fryer, cut up (3-4 lbs)
- 2 cups flour
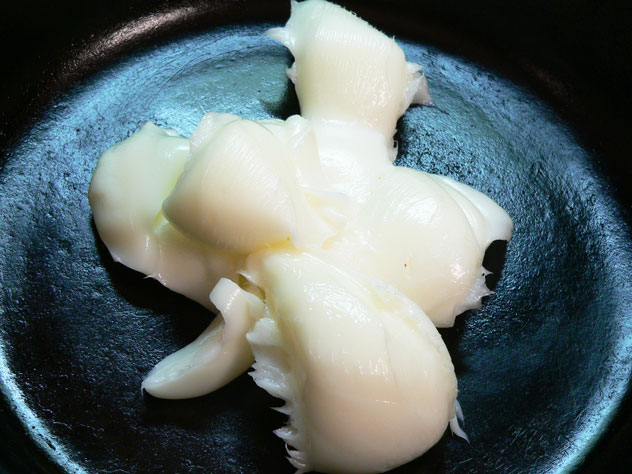
- 1 tablespoon butter
- salt and black pepper to taste
- lard or shortening for frying
What you’ll need to make the gravy
- 1 cup milk
- 1 cup water
- 2 tablespoons butter
- 4 tablespoons flour
- salt and black pepper to taste
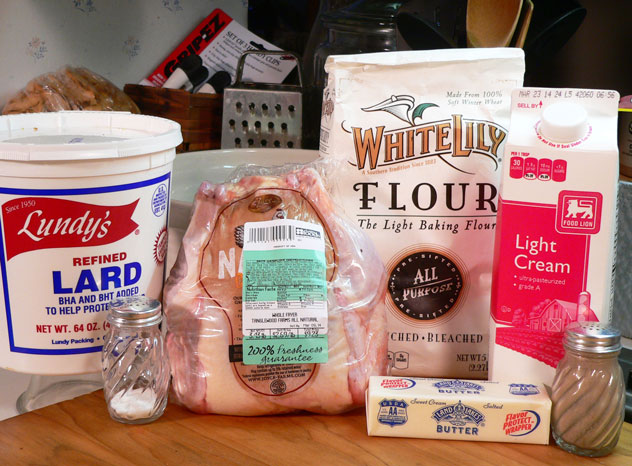
Fried Chicken with Gravy: You’ll need these ingredients. I’m using light cream simply because I didn’t have any fresh milk. photograph by Steve Gordon
I like to work with chicken in the sink. You’ll want to be sure the sink is good and clean before starting and that you clean and sanitize it after you’ve finished. More on that later.
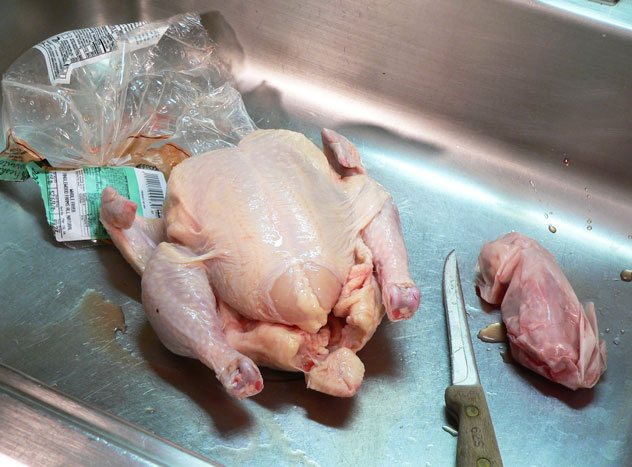
When you open the packaged fryer, you’ll probably find a packet inside the cavity of the bird. You’ll need to remove this and set it aside. The packet contents may vary, but they will usually contain the chicken gizzard, liver, heart and neck. You can use these to make a giblet gravy if desired, but I just normally save them for making stock. photograph by Steve Gordon
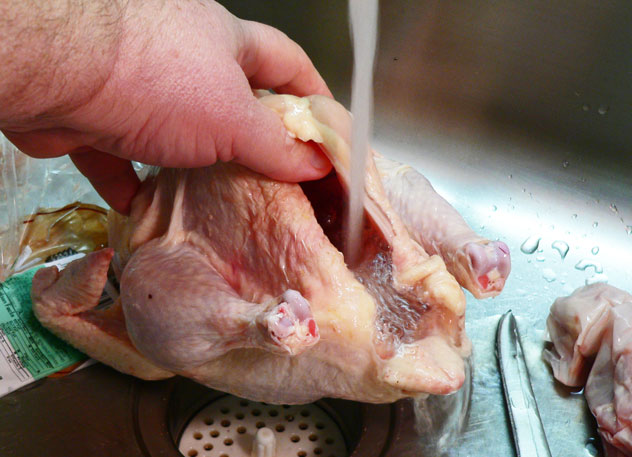
Give the chicken a good bath inside and out. You will also want to check the skin of the chicken for any small pin feathers that might be left attached. You can easily remove those with your fingers and discard them should you find any. photograph by Steve Gordon
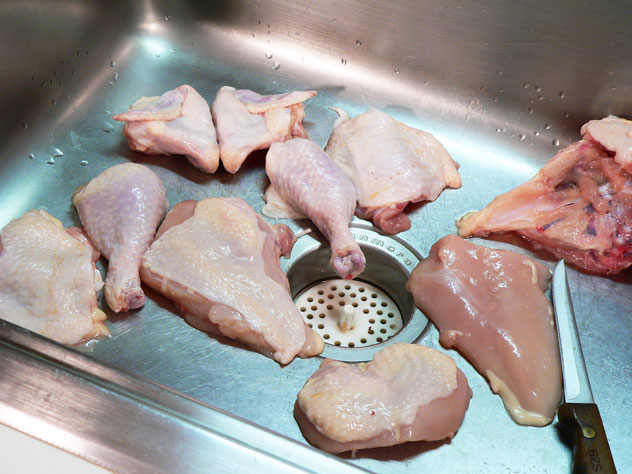
Whole fryers are normally a little cheaper to purchase. Cutting them up is a process within itself and one we’ll save for a later time, probably after I get much better at it myself. I do know that you MUST have a very sharp knife to do it with. Dull knives cause many more kitchen accidents than sharp ones. It’s always good to practice your “cutting-up-a-fryer skills” whenever possible, so I buy whole fryers most of the time. Cut the chicken as desired. Be sure to save the back, giblets, and any other pieces to use in making stock later. photograph by Steve Gordon

Raise your hand if you know what this cut is. Growing up, this was probably my favorite part of the chicken. If you know what it is, you’ll understand why. You aren’t going to find this at the “Colonel’s” place, or probably any other fast food restaurant. For some reason, folks pretty much don’t cut their chickens this way any longer. I’ll be waiting for your answer in the “Comments Section” below. photograph by Steve Gordon
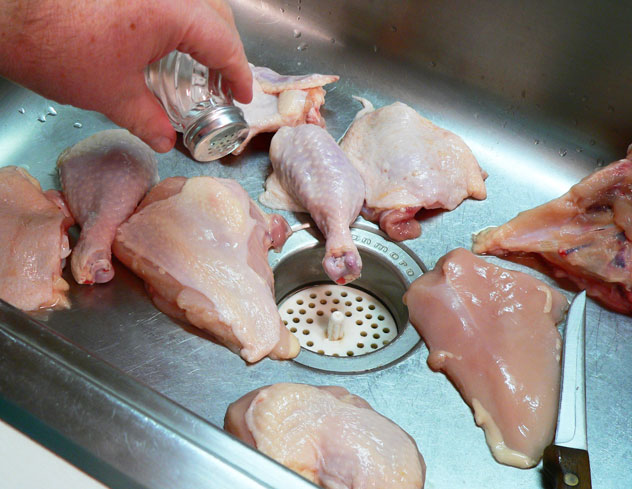
Once the chicken is cut up, sprinkle on a little salt. It will not take much, so go a little easy. photograph by Steve Gordon
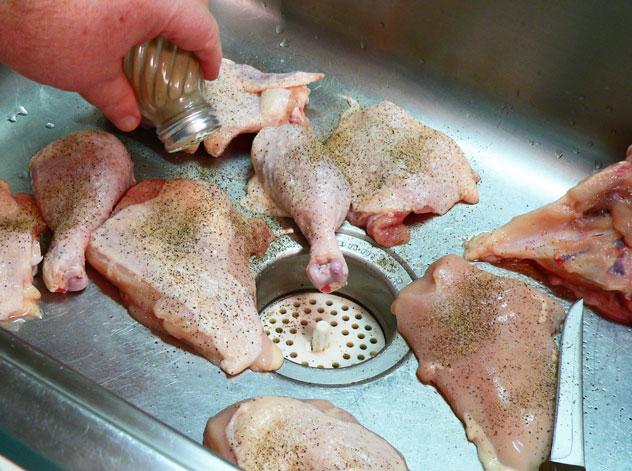
Go ahead and sprinkle on some black pepper. Flip the chicken pieces over and salt and pepper the other side. I always like to add salt and pepper directly to the chicken as opposed to mixing it into the flour. It’s also super easy to do with the chicken still in the sink, so don’t hate me for my technique today. Once I’m finished, I’ll wash out the sink with hot soapy water and then spray the sink down with the same stuff restaurants use to clean their work surfaces – a special chlorine solution. photograph by Steve Gordon
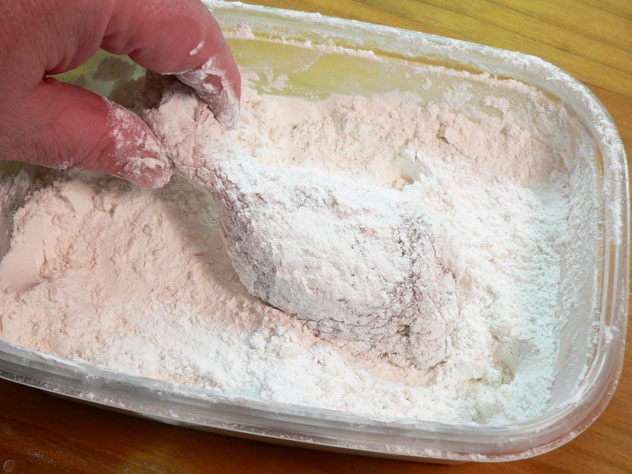
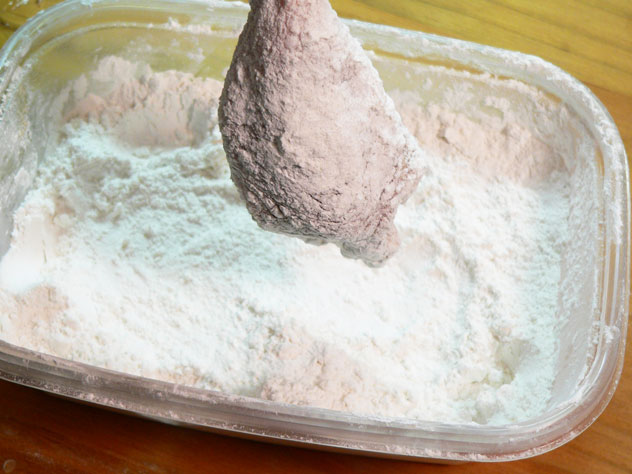
Place some flour in a shallow bowl, then dip each piece of the chicken into the flour. Turn it all around and coat all sides with flour. photograph by Steve Gordon
Shake off any excess flour and then place the coated chicken on a baking sheet or wire rack. photograph by Steve Gordon
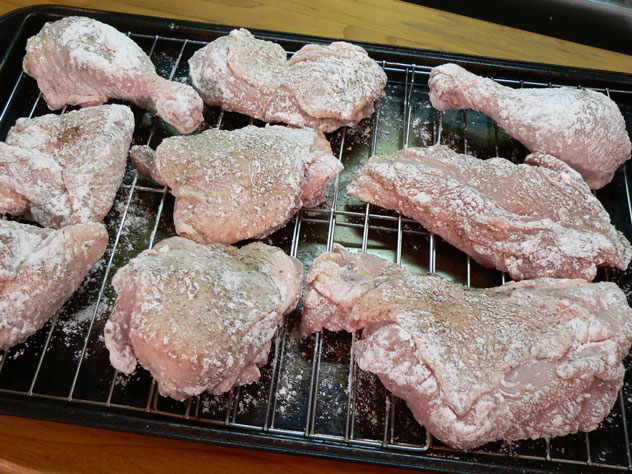
The coated chicken needs to rest and dry out a bit before frying. I typically leave it on the counter while I’m heating up the oil, but you could place the whole pan in the refrigerator while you do that if you’re worried about it getting too warm. photograph by Steve Gordon
Yep, it’s lard. We ARE making Southern fried chicken…right? You could use shortening or liquid oil, like peanut oil, but I’ll stick with the lard. I probably have about two cups here and I added a bit more once it had melted down in the cast iron skillet. You need enough liquid oil to measure about 3/4 of an inch deep. Place the skillet over medium heat and let it come up to 350ºF. photograph by Steve Gordon
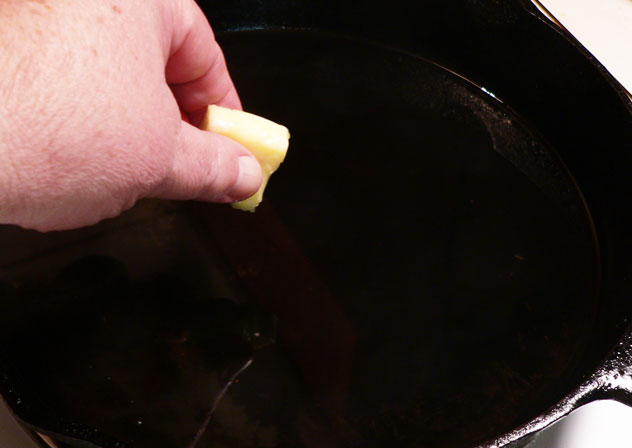
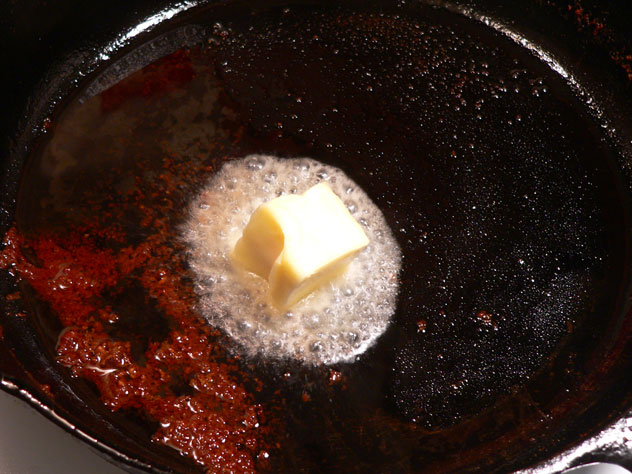
When the lard is melted and is getting close to frying temperature, carefully add the butter. photograph by Steve Gordon
Be careful adding the butter. It’s going to spit and spatter as it starts to melt. You could use a spoonful of bacon grease if you have that instead of the butter. It’s going to add a little flavor to the lard and will also help to brown the chicken a bit. photograph by Steve Gordon
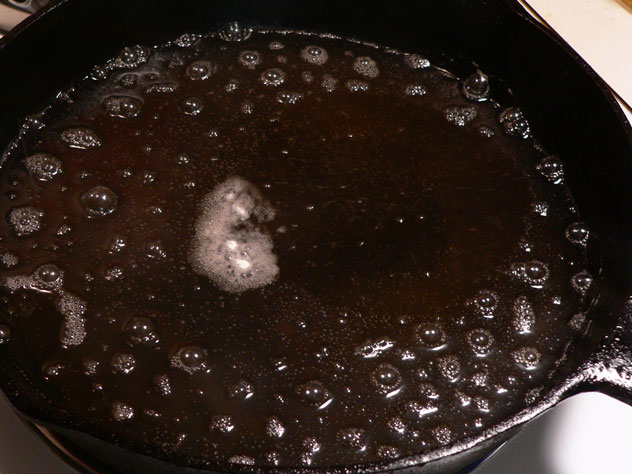
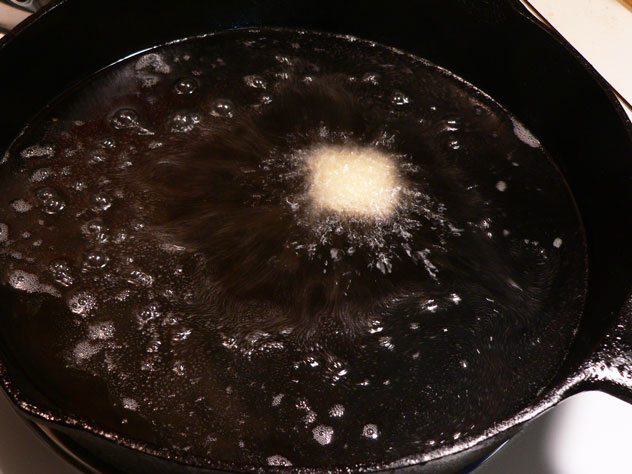
The older cooks often dropped a pinch of flour into the hot oil. If it dances around on top, the oil is ready to start frying. If it just sinks to the bottom with very little sizzle, you have to let the oil continue to heat up. When you start seeing little whiffs of smoke, you’re getting too hot already. An open pan of hot oil can be a dangerous thing. Keep small children away from the stove at all times. Keep a lid close by so you could place it over the skillet if it happens to get too hot and catch fire. Always use caution. photograph by Steve Gordon

When the grease is at 350ºF, start adding the chicken. Carefully lower a piece of the chicken into the pan – skin side down. photograph by Steve Gordon
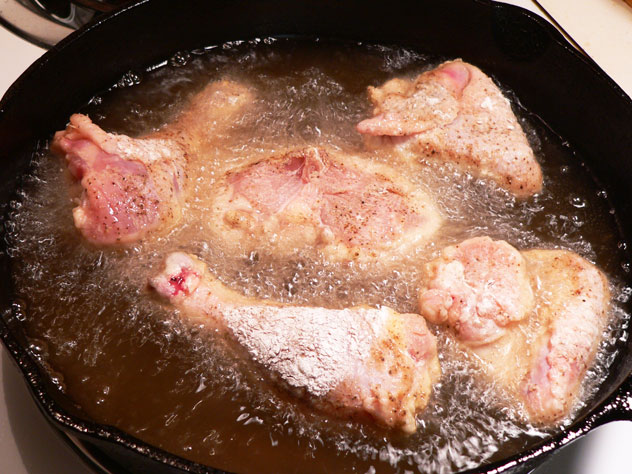
Don’t overcrowd the skillet with chicken. If you’re frying the entire chicken, you’re going to have to do it in two batches anyway. I generally fry up the legs and wings first, leaving the breast and thighs for the next go round. That mystery piece is what you see in the middle. photograph by Steve Gordon
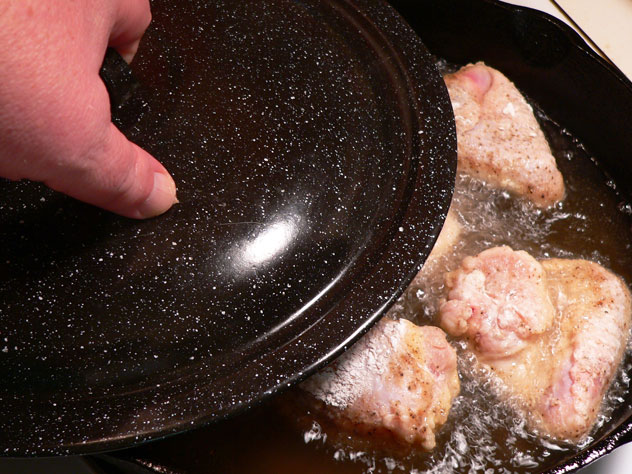
Once you get the first batch into the skillet, cover it with a good fitting lid and start the timing process. I found that the lid from my enamel canning pot works great as a lid for my skillet. And, like the skillet, it gets very hot so always be careful when removing any lid. When the lid is on, start the first 8 minute time segment. The chicken will cook 8 minutes with the lid ON. It’s also important to “listen” to the chicken as it’s frying. You can hear if it sounds like its bubbling really fast (and it will at first.) Learning to recognize how it “talks” to you will help you fry better chicken. photograph by Steve Gordon
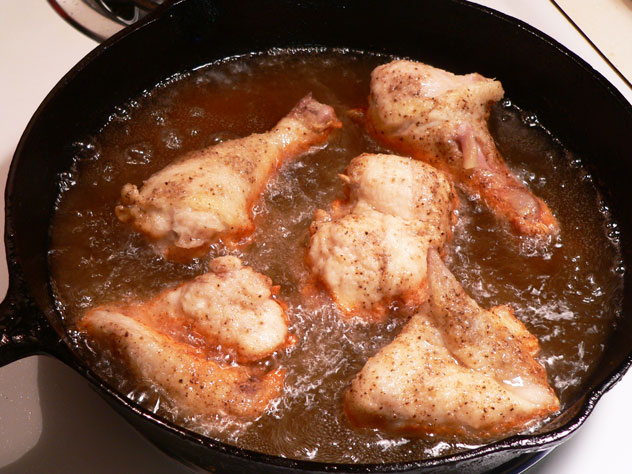
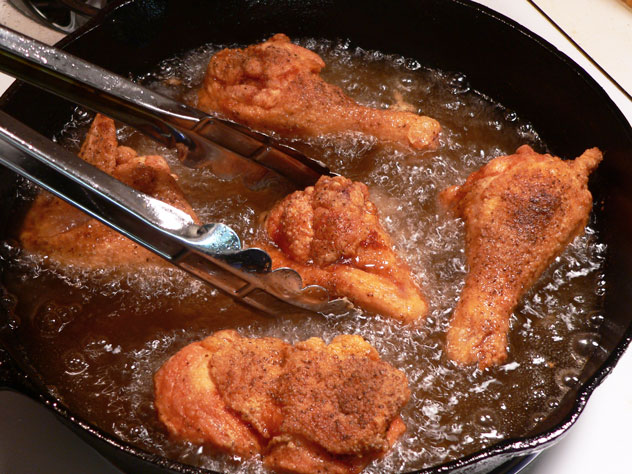
Next, remove the lid and start the second 8 minute frying segment. You’ll hear a difference in how fast the chicken is cooking by now, as it starts to get done on the one side. We’ll leave the lid off and cook the chicken for 8 more minutes before we turn it. photograph by Steve Gordon
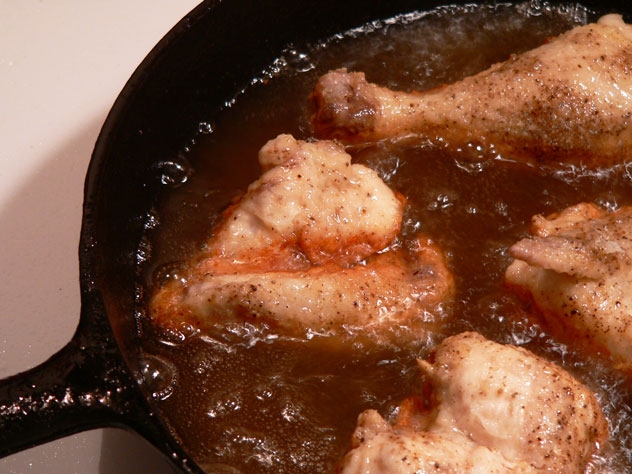
As you can see here, the wing is starting to brown on the bottom pretty well. You can see where the browned part is even above the oil line in the skillet. If you’re worried about it burning, use some tongs to gently lift the chicken and take a look at the bottom. It’s OK to lift it to look, just don’t turn it if it’s not burning. Most pans will have a hot spot in them I suspect. What I like to do is just twist the whole pan around on the burner so it’s not cooking in the same position all the time. photograph by Steve Gordon
At the end of the 8 minutes, use some tongs and turn the chicken pieces over. Try not to turn the chicken with a fork as piercing the skin and meat will cause the juices to drain out. The chicken has now cooked 16 minutes. photograph by Steve Gordon
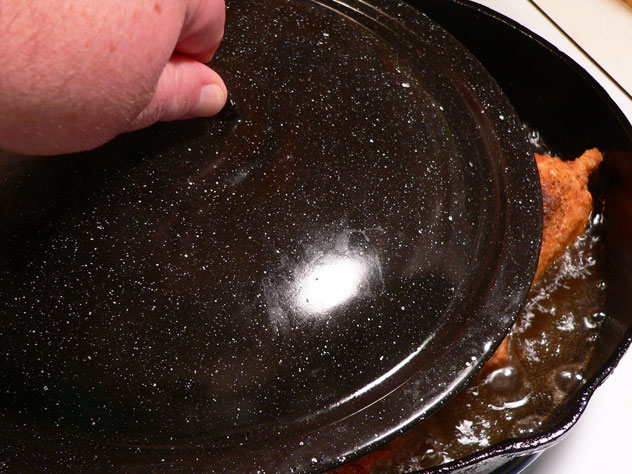
Place the cover back on the skillet. We’ll let it cook 8 more minutes with the cover on. photograph by Steve Gordon
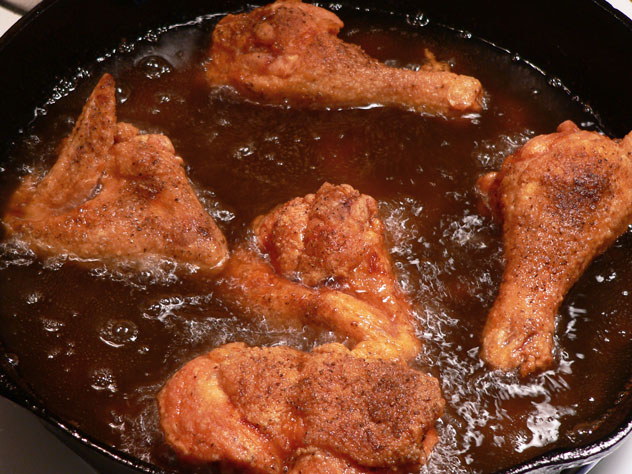
At the end of the third 8-minute segment, remove the cover. It’s possible the chicken would be totally done at this point, depending on the heat of the oil. It’s best if you can test the internal temperature with a thermometer, but if you don’t have one try cutting into one of the chicken pieces with a sharp knife. If the juices that run out are still red or pink, the chicken is NOT done and needs to cook a little longer. Depending on the size of the chicken, the legs and wings may need to cook for another full 8 minutes. That would make a total of 32 minutes, and a pretty safe bet that all the chicken would be done. photograph by Steve Gordon
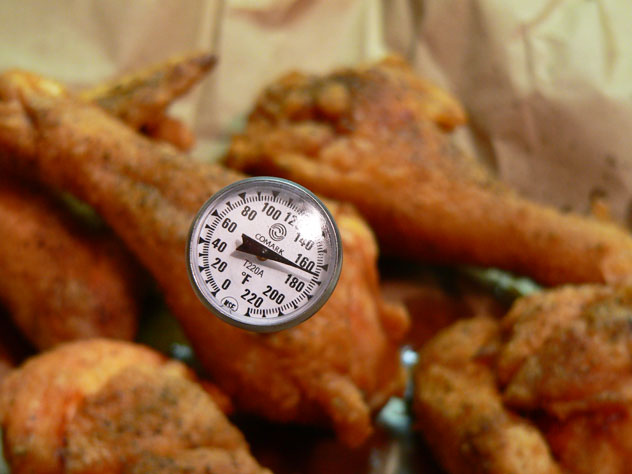
According to the US Dept. of Agriculture (USDA), chicken is fully cooked and safe to eat when it reaches an internal temperature of 165°F. If you don’t already have one, I highly suggest you pick up a thermometer on your next shopping trip. They’re extremely handy in the kitchen. photograph by Steve Gordon
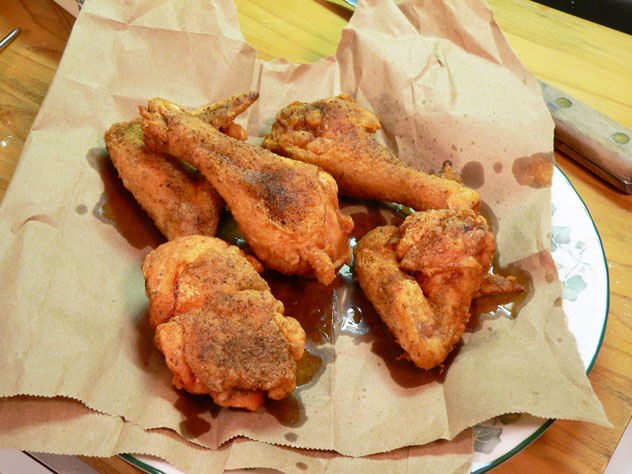
When it’s done, remove the chicken from the skillet and place it on a wire rack or a brown paper bag to drain and cool. Paper towels will soften the crispy skin you’ve tried to create. A brown paper bag placed on a plate is a good way to drain the chicken. Now, I know you’re saying that looks like a lot of grease, and you’d be right. Just remember, it’s going into the paper and NOT staying in the chicken. photograph by Steve Gordon
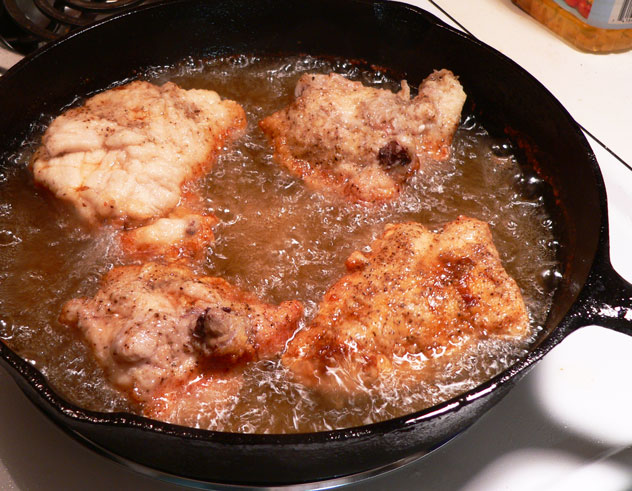
Repeat the cooking process with the remaining batch of chicken. If cooking boneless breasts, they will probably cook quicker than the other pieces. Keep a close watch on them after they have cooked a bit so you don’t overcook them. It’s a learning process, but you can do it. I know you can. photograph by Steve Gordon
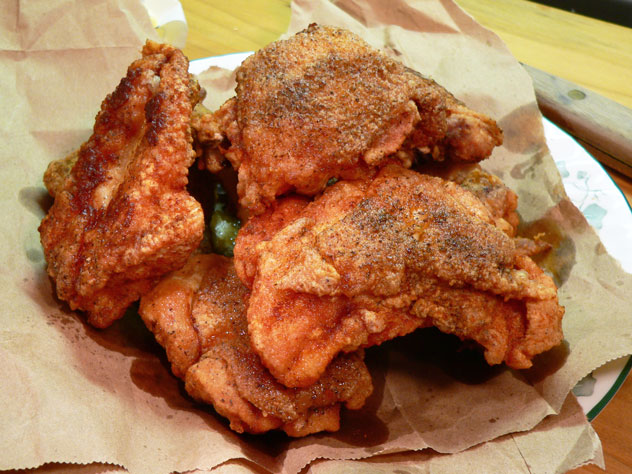
Remove the remaining pieces of chicken when done, and let them drain as well. If you’ll be serving very soon, the chicken can just drain and cool a bit on the rack or paper. You could also keep it warm in the oven for a short period of time. Set the oven temperature to around 200° and place the meat uncovered in the oven. Unlike some other meats, chicken doesn’t need to “rest” once it’s cooked. It just needs to get cool enough from frying so as not to burn your mouth. Ouch! photograph by Steve Gordon
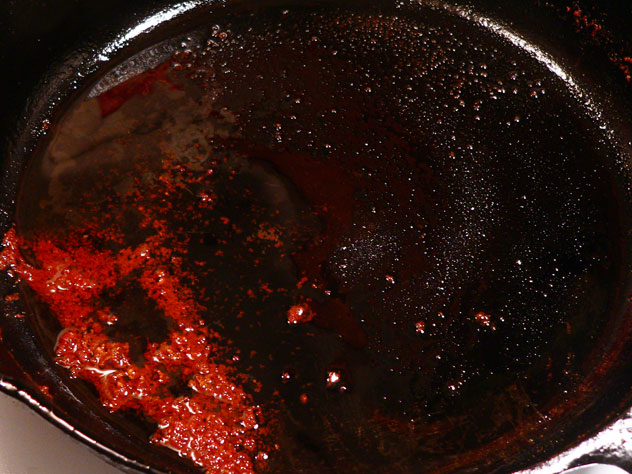
Now, let’s make the gravy. Start by draining most of the grease out of the skillet. Typically, I’ll just pour this hot grease into a metal can that I keep for such purposes, or I’ll pour it into a small sauce pot to let it cool. KEEP about 4 Tablespoons of the oil in the skillet along with the browned bits. Those bits are full of flavor that we’ll be looking for in the gravy. photograph by Steve Gordon
It’s best to have your flour, milk and water measured out before you start working on the gravy. It will pretty much need your undivided attention while you’re making it. Return the skillet to the stove top over heat just a notch or so below medium heat. Add the butter and let it melt completely. Be careful that it doesn’t cook too fast and start burning right away. photograph by Steve Gordon

Once the butter is melted, sprinkle the flour all around inside the skillet. photograph by Steve Gordon

Working quickly, stir the flour into the butter and remaining oil. We’re going to make a roux to begin with and it will require you to just keep stirring, so it doesn’t stick or burn. REDUCE the heat down to about medium-low and let the flour cook for a minute or so. The roux needs to cook so the “flour taste” cooks out of the roux. This will only take a minute or two and the longer it cooks, the darker it gets. Just keep stirring and you’ll be good to go. photograph by Steve Gordon
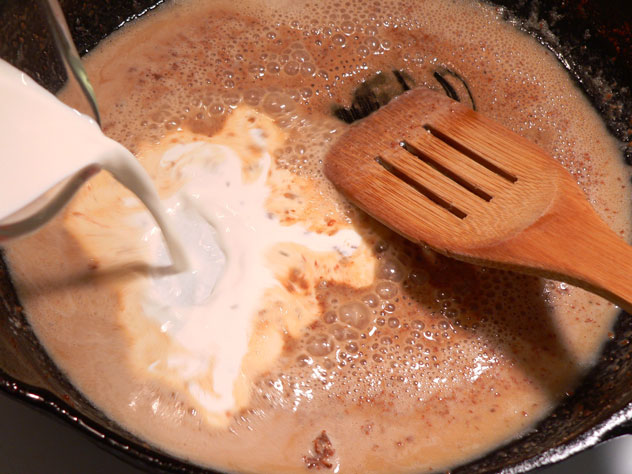
OK, you’ve got a fairly warm mixture in the skillet. Now, we’ll add the milk a little at a time. The milk should be cool, but not real cold when you start adding it. Just continue to stir the roux as you gradually add the milk. You’ll probably start seeing some lumps, but that’s OK. Just continue to stir and work them out as you go. photograph by Steve Gordon
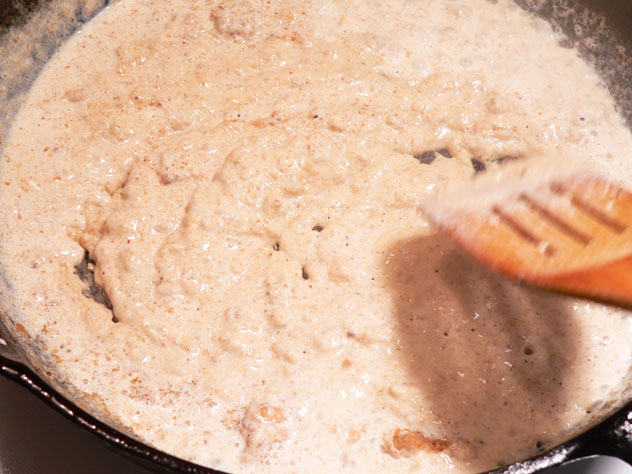
I was using light cream instead of milk and as you can see, it thickened up pretty quick. I was concerned it was getting away from me because I was trying to get the pictures at the same time. (Try that while adding milk and stirring.) I continued to stir it quickly and added all the cream into the roux. photograph by Steve Gordon
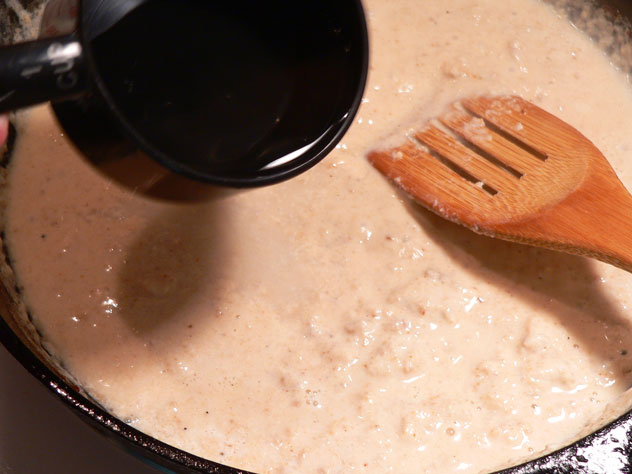
Do the same thing with the water. Add it gradually and just keep stirring. The water also needs to be cool. photograph by Steve Gordon
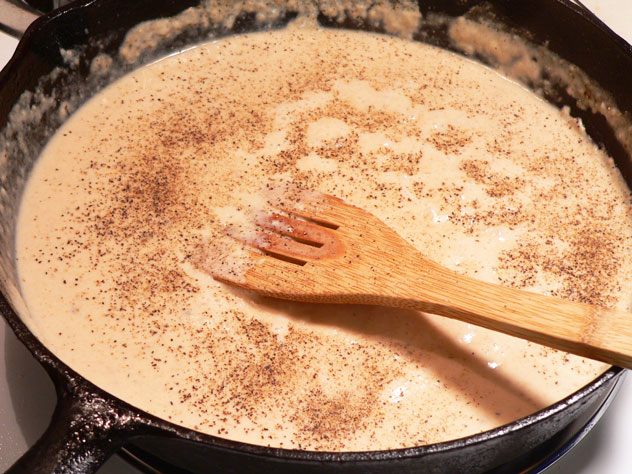
With a little work, I think I recovered the gravy pretty good by constant stirring. Add a little black pepper at this point. photograph by Steve Gordon

Stir the pepper into the gravy and then taste it. Need more pepper? Maybe a little salt? photograph by Steve Gordon
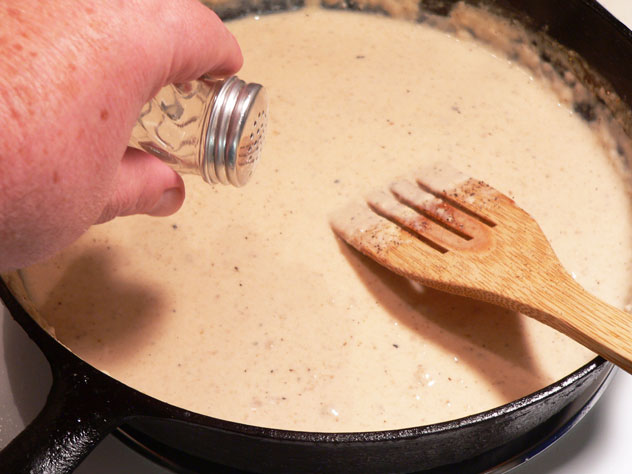
Salt should be added last if needed. You’ve got salt and pepper in those brown bits and probably some salt from the butter. You may not even need to add any more, it just depends on your personal taste. The gravy may need to simmer a few minutes to reach the desired consistency. If it’s too thick, add a little more milk and water. If it’s too thin, let it simmer a little longer. When it’s to your liking, pour it into a gravy boat or small bowl. Some folks will place the chicken back in the skillet and let it simmer a bit with the gravy. I prefer to serve the gravy “on the side” and add it to the chicken once it’s in my plate. Good stuff! photograph by Steve Gordon
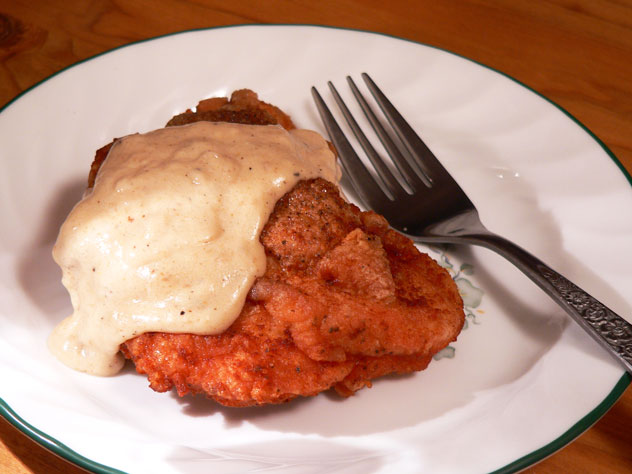
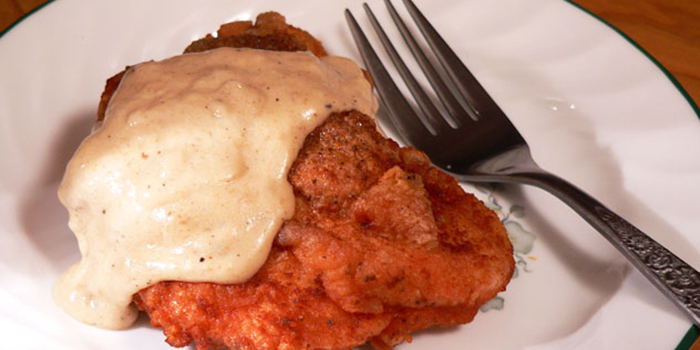
Serve the chicken warm, top it with some gravy and… Enjoy photograph by Steve Gordon
–
Steve Gordon is a writer, recipe tester, and lover of all things Southern. You can read more of his writing and step-by-step recipes at tasteofsouthern.com. Click here to find more of his recipes.
print it